Showing posts with label DIY. Show all posts

Thursday, June 7, 2012

Hexagonal


After a long period of fear and procrastination, we finally tiled our bathroom floor.  As you may remember, when we bought the house, the bathroom had decent looking grey and white tile in the tub surround, counter and backsplash, but the floor was just sheet vinyl (as shown below).  It actually wasn't too ugly for sheet vinyl and vaguely resembled white tiles with grey grout.  But, it still needed to go.  


I have always loved hex tiles, especially on bathroom floors.  I know they aren't that practical, since there is an awful lot of grout to get stained or cracked.  But we figured that with dark grey grout, stains shouldn't show up nearly as easily as with white grout.  

The whole process ended up being pretty involved and taking two weekends.  First we took off the base boards, ripped up the vinyl and took off the toilet.  In a house with only one bathroom, having to take off the toilet is a pretty major deal.  Underneath the vinyl was just plywood subfloor which apparently is too flexible for tile.  So we cut and thin-setted down cement backer board.  After that was dry and we could walk on it we put the toilet back on.  The tile we ordered from Lowe's still hadn't come in yet and we weren't going to go all week without a toilet.  

Once the tile finally came in we took the toilet off again and started dry fitting and cutting the tile. Cutting 1" hex tile on a mesh backing is not an easy thing to do.  We tried cutting it with a wet saw borrowed from a friend at first, but the water disintegrated the glue on the mesh backing and all the tiles started falling off.  We ended getting this kind of paper-cutter-like thing that we used to hand score the tiles and then crack them.  Not super accurate on 1" tiles, but it worked well enough for us. 


After dry fitting all the tiles and numbering each sheet, we layer them down with thin-set.  


Here they are all thin-stetted down. 


The next day was grouting, then buffing, putting the toilet back on, and more buffing. 


All in all I think it turned out pretty ok for our first ever tiling experience.  Definitely not perfect, but good enough to live with. 


We still need to put the baseboards back on.  That should hide some of the roughness around the edges.   


I think it made us more confident in the possibility of tiling the kitchen floor and backsplash at some point and I think it saved us a good chunk of change. 


Tuesday, July 12, 2011

New Couch

We ordered a new couch from West Elm to finally replace to old, brown, cat scratched, ikea couch that I had been dragging around each time I moved since 2003. It is the lorimer sectional in charcoal faux-suede. Charcoal faux-suede was not the stock fabric for the couch, but we wanted it because it would be harder for the cats to get their claws into. West Elm said it would take 8-10 weeks to deliver the couch (which is already a crazy long time), but it actually took 11 weeks.

It was such a long time to wait. But it finally came on Friday.


We probably should have measured before we ordered it, because it might be a little too large for the space. If we were on "designed to sell" they would tell us it was making the living room look smaller than it is. But, it is so wonderful for both Nate and I and the two cats to be able to lay on the couch comfortably.

We had been waiting for the couch to come before we put up anything up on the walls in the living room, incase we needed to reposition the buffet that the TV sits on.


The living room is looking so much more like home with pictures on the walls.


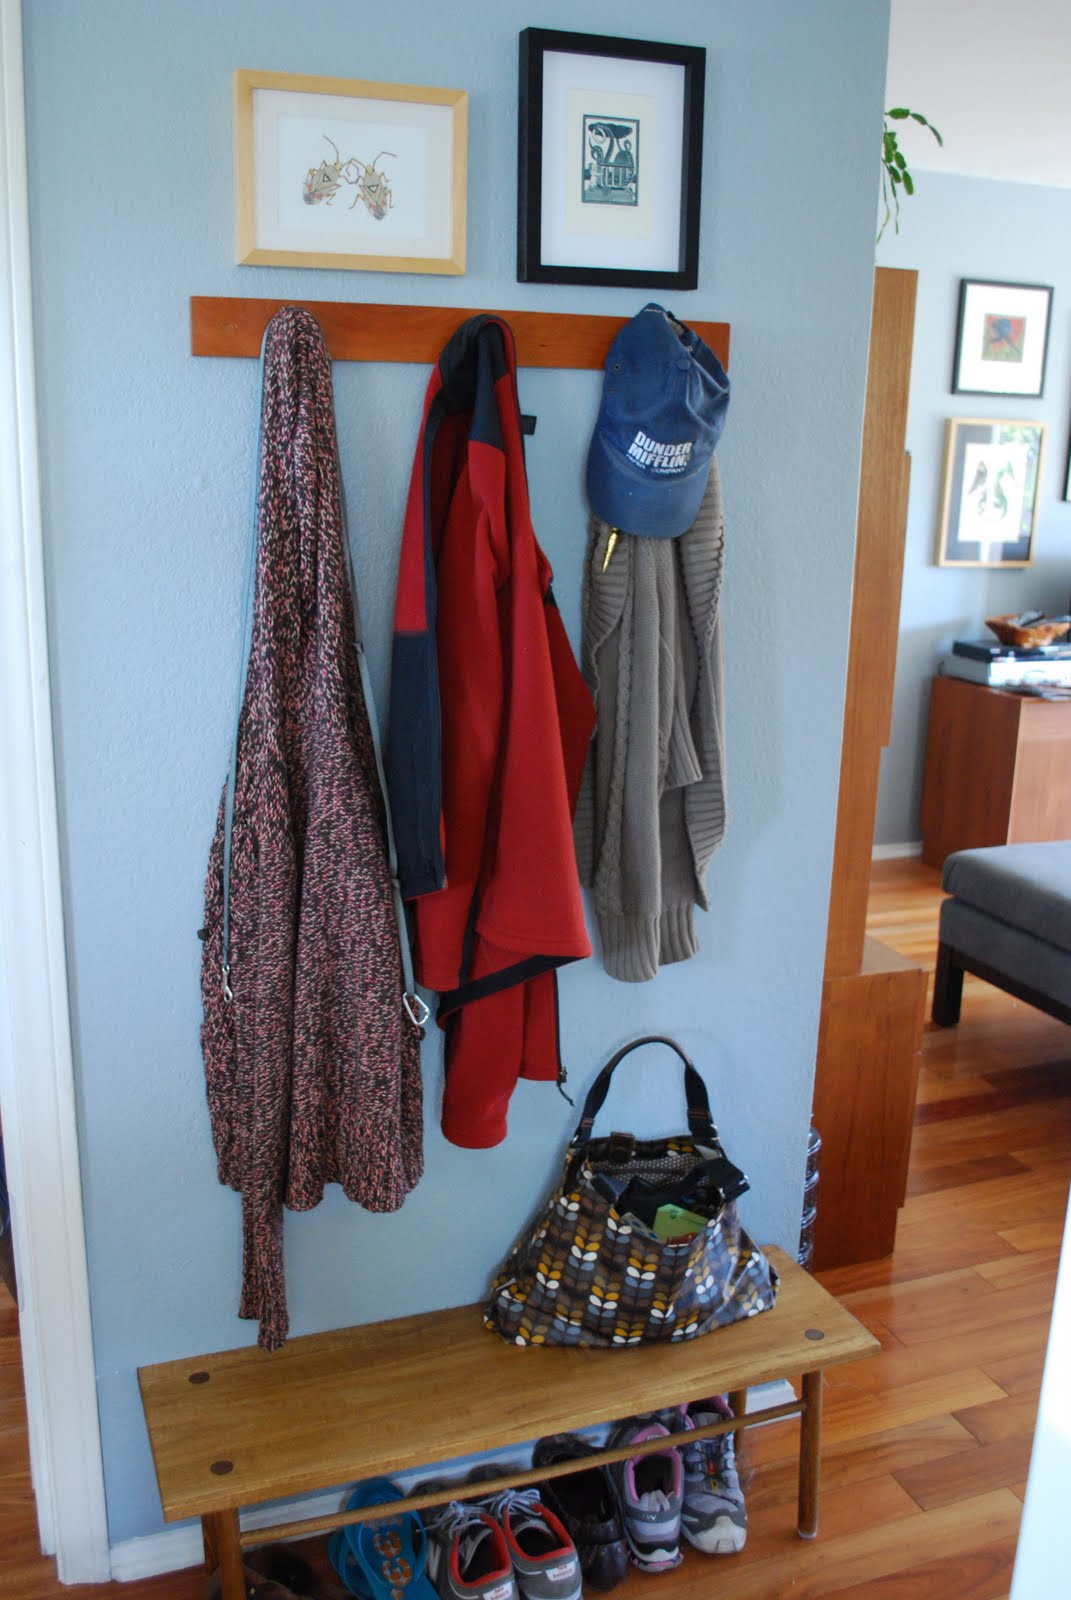
We also put up some wedding pictures and our quaker wedding certificate/ketubah in the entryway. It is almost our one year anniversary and it's nice to be reminded of the wedding every time we walk by.


Also, Nate is getting really handy with his power tools. He built this little bench to use as a landing strip for my purse and to hide shoes under.


Monday, June 27, 2011

Cat Scratcher

Nate made this cat scratching box for Harris and Flynn the other day. It is just a wooden frame that one of those corrugated cardboard cat scratchers slides into. It is mounted on the wall so that they can stand on their hind legs and scratch a vertical surface, which they love to do. We are supposed to be getting a new couch delivered from West Elm (though it is taking forever), so hopefully this will save the new couch some abuse. Then when the scratcher is thoroughly shredded, we can just slide it out and pop in another one.


Neither cat wanted to cooperate for the photo shoot this morning.


Here is Harris scratching on it before I painted over the mounting screw heads and before I trimmed the box so that it fit perfectly.

And here is Flynn. He was a little more interested in licking the cardboard that scratching it since it had catnip sprinkled on it.

Thursday, June 16, 2011

Paint It, Black


Despite my assertion in my earlier post, the barn was not complete. There was one nagging problem. The floor. The floor was previously covered in fugly peel and stick vinyl tiles. They wouldn't have been so bad if they were the black and white checkerboard ones but these were just really unattractive and they were starting to unstick completely.

Underneath the tiles was a plywood subfloor. On line I saw some examples and a few tutorials of painted subfloors. So we decided to just pull up the tiles and paint the plywood black.


We borrowed a friend's belt sander and sanded down the floors. There was quite a bit of stickyness from the old vinyl tiles which did not really all come off with the sanding. We decided that since this is the barn it doesn't have to be perfect. If we were doing this inside our house we would have been much more thorough and probably patched some screw holes and the gaps between the plywood sheets better.

Then, after taping, we primed the floor with grey tinted primer and then two coats of Valspar latex gloss porch and floor paint in dark kettle black.


It covered really well and it looks pretty great. The only problem is that it shows every speck of dirt and dust. Black was probably not the best choice for the floor of a building that you have to walk through grass to get to.


It has made me think that probably one of the reasons that natural wood floors are so common all over the world is because brown is close to the color of most dirt and dust.

Friday, May 27, 2011

The Barn is Complete


Now it's time for Barn after pictures.


One of my proudest contributions to the barn is "The Barn" pig sign. I originally bought a wood cookie from Michael's to make a "The Barn" sign out of but felt kind of ridiculous paying more than $9 for a slice of wood. I found this wooden pig plaque at an estate sale which I think is much cooler and I think only cost 25 cents. I carved out "the BARN" and then painted the carved out parts with left over barn paint. Nate is very proud that he strategically placed the screw holes to attach the sign to look like the pig's eye ball and anus.


Also notice the strange weather vane in the background in the neighbor's yard. The red on the weather vane perfectly matches the barn and it really adds to the barnyard feel.


The doors are now swinging freely. Hopefully they will stay that way for a while. We try to keep them closed most of the time since they are just so heavy that the hinges will probably eventually give out again.


Here is the completed cork wall. It is pretty huge. It will take a long time to fill that thing up. The cork tiles are still sticking surprisingly well. I was a little worried since the adhesive we used is normally for floors which have gravity working with them instead of against them in keeping the flooring attached to the floor. I think the tiles worked much better than a roll because the curling of a roll of cork would have been a problem in trying to get it to adhere to the wall.


Nate got some hooks from the music store and hung up his guitar and ukulele. This place is pretty much his man cave where he can not only work, but play music, drink beer from the kegerator and whatever else it is that men do.


We got this awesome mid-century massaging lounge chair off craigslist. It is ridiculously comfortable and sort of gives the barn a psychiatrists office feel.


Nate also got an office chair off craigslist. The built in desk is way higher than a normal desk, so he needed one that goes up and down. We were trying to find a vintage office chair, but most of the older ones only have one height setting. I think this one is a knockoff of the Eames Soft Pad Management Chair.


Please ignore all the wires. We need to do something about that, maybe drill a hole in the built in desk. Oh, we got the desk lamp from the Salvation Army on 40% off day.


I found this old pencil sharpener at a garage sale. It works so much better than my stupid electric pencil sharpener. Now I have to go out to the barn whenever I need to sharpen a pencil.


I really wanted a old wall mounted bottle opener somewhere in our back yard. Since the barn is kind of right in the middle of where people would hang out for a BBQ it seemed like the perfect place. I found this one from Prime Time Vintage Shop on etsy. It is an old advertising piece for Stegmaier Gold Medal Beer from Wilkes-Barre, PA.

Anyway, we are pretty proud of the barn. It may not be gorgeous, but it allows Nate to be able to write at home without being distracted by me or the cats. And it's also a pretty good man cave for him.

Thursday, May 26, 2011

Barn Progress

The first thing we did was tear off the planter box that was under the front window. It was completely rotted. So much so that there were actually worms living inside the wood. Then we primed and painted the barn.
We chose Valspar's La Fonda Antique Red for the paint color. I guess it is named after the La Fonda hotel in Santa Fe, NM, but we chose it because it is such a barn red color. It really makes the barn stand out while the beige made it kind of recede into the background.

The second major project we tackled was rehanging the barn doors. We didn't stop to take any pictures of that, but it was a major undertaking. We bought new much larger hinges. The old hinges were only screwed into the trim a lot of which was pretty rotten and causing the whole thing to sag about two inches. Eventually the bottom hinge for the bottom door just came off completely. We replaced some of the rotten trim and got much longer screws so that the door is attached to the wall and not just the trim. People say that hanging a door is one of the few home improvement things you should never DIY. They may be right. It didn't turn out perfect, but it is a vast improvement to the sagging/falling off mess it was before.

The last project was the cork wall. Nate is a writer and part of his process is listing out plot points on index cards, pinning them up and rearranging them. Since the barn was going to be his writing shed he wanted lots of space to pin up his index cards. Large framed cork boards are surprisingly expensive so he decided he wanted to just cork one entire wall of the barn. You can buy peel and stick cork squares, but those are also surprisingly expensive. I found a blog (which I can't find right now) where someone used cork underlayment which is usually used to go underneath wood floors to create a cork board wall in their kitchen. The underlayment is much cheeper and comes in either rolls or tiles and in different thicknesses. I found 1/4" tiles at widgetco.com.

We attached it to the wall with floor adhesive.

The walls were exactly 6' high so two 2' by 3' tiles fit perfectly. We did have to cut out a hole for the electrical outlet and cut the last two tiles to fit.